| Control |
Description |
 |
New &endash;
Click to create a new, blank text object. If an existing text object is
already open for editing, you will be prompted to save it first. |
 |
Open &endash;
Click to import an existing text file. Browse for a text file to open
using the Open
dialog box. You may import Rich Text (*.rtf), Plain Text, (*.txt), and
HTML (*.html, *.htm) file formats. The extension will determine the format
of the imported file. (Unrecognized extensions will be imported as Plain
Text.) |
 |
Print &endash;
Click to open the Print
dialog box, allowing you to print the current text to a selected Windows®
printer. |
 |
Save &endash;
Click to save the text object to the system. SiteSpinner® Pro will assign
it a default name, which will be visible in the Text Object Selection
drop-down menu. |
| You must save
or cancel the text object before you can exit the Text Editor dialog box
and return to the Work Window. Do this by clicking the Save and Close
button at the bottom of the dialog box. Or, press ALT+ENTER for a fast
"Save and Close." |
 |
Save As
&endash; Click to open the Save As dialog box, allowing you to export
the contents of the Text Editor dialog box in either Rich Text (*.rtf),
Plain Text, (*.txt), and HTML (*.html, *.htm) file formats. |
 |
Cut &endash;
Click to cut highlighted text in the Text Editor dialog box and copy it
to the clipboard. |
 |
Copy &endash;
Click to copy highlighted text in the Text Editor dialog box. |
 |
Paste &endash;
Click to insert cut or copied text. You may also paste text copied from
other text editors or word processing applications into the Text Editor. |
 |
Undo &endash;
Click to reverse the previous editing operation. |
 |
Redo &endash;
Click to reapply an edit operation that has just been undone. |
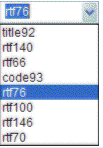 |
Object Selection
&endash; If you have opened the Text Editor dialog box without first
selecting a text or code object in the Work Window, a new text object
is created. However, you may select any code, text, or title object in
the project from the drop-down menu. If you have first selected an object
and then opened the Text Editor dialog box, the object's name is displayed. |
| You may rename
a text or code object by typing over the displayed name in the Object
Selection box. Names must not begin with a numeral or contain any special
characters or blanks. |
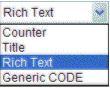 |
Format Selection
&endash; Select an object format from the drop-down menu. Choose among
Title, Rich Text, or Generic Code. (Counter format is not available in
SiteSpinner® Pro.) The Text Editor will change to accommodate the format
selected. |
 |
Background
Color &endash; Click to toggle the background color of the Text Editor
dialog box text area between the default white and a custom color. The
custom color can be useful is for example you are working with a light
font color that would otherwise be difficult to see. You may set the custom
color yourself, using the Color dialog box (on the Text Editor dialog
box, OptionsEditor Toggle Color). Your selection will not affect the actual
background color of the text object. To change the background color, use
the Shading Editor dialog box. For more information, see Color Dialog
Box. |
 |
Autoscroll
&endash; Click to add a vertical scrollbar to your text object. This is
useful if you have long text passages. If you do not add a scrollbar to
text that exceeds the vertical dimensions of the text object, the text
will be cut off. (Not
available in Code Edit Mode.) |
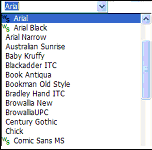 |
Font Selection
&endash; Select from the drop-down menu a font to apply to highlighted
text in the Text Editor dialog box. The menu offers all fonts available
on your system. (Not
available in Code Edit Mode.) |
|
|
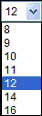
Font
Size &endash; Select a font size for the selected text in the Text
Editor dialog box. By default, the menu options are Point Size values.
You may change the options to Pixel Size values by changing a setting
in the Options and Filters dialog box (on the Text Editor
dialog box, Options>Options and Filters). For more information,
see Options
and Filters Dialog Box. (Not available in Code Edit Mode.) |
|
“Web-safe”
fonts are marked with a green OK symbol. Web-safe fonts are fonts that
were installed on your system together with your Microsoft® Internet
Explorer® browser. You can use these fonts fully confident that your users
will view your text using the same font as you intended. |
|

|
Bold
&endash; Click to apply a boldface effect to the highlighted text in the
Text Editor dialog box. (Not available in Code Edit Mode.) |
 |
Underline
&endash; Click to underline the highlighted text in the Text Editor dialog
box. (Not
available in Code Edit Mode.) |
 |
Italic
&endash; Click to italicize the highlighted text in the Text Editor dialog
box. (Not
available in Code Edit Mode.) |
 |
Strikethrough
&endash; Click to apply a strikethrough effect to highlighted text in
the Text Editor dialog box. (Not
available in Code Edit Mode.) |
 |
Justify Left
&endash; Click to set line justification to the left. (Not
available in Code Edit Mode.) |
 |
Center
&endash; Click to center line justification. (Not
available in Code Edit Mode.) |
 |
Justify Right
&endash; Click to set line justification to the right. (Not
available in Code Edit Mode.) |
 |
Full Justify
&endash; Click to monospace the selected text (spread the text horizontally
to fill the text object). Note that some browsers do not recognize full
text justification. (Not
available in Code Edit Mode.) |
 |
Bulleted List
&endash; Click to apply bullets at the start of each new paragraph in
the text. (Not
available in Code Edit Mode.) |
 |
Numbered List
&endash; Click to number each new paragraph in the text consecutively
beginning with 1. |
 |
Font Color
&endash; Click to open the Color dialog box to select a system or custom
color to apply to highlighted text. (Not
available in Code Edit Mode.) |
 |
Link Editor
&endash; Click to open the Link Editor dialog box to allow you to create
or edit a hyperlink for the selected text object. For more information,
see Link
Editor Dialog Box. (Not
available in Code or Title Edit Mode.) |
| Be careful
when applying hyperlinks to text inside the Text Editor dialog box. Because
hyperlinks applied to an object take precedence over links within the
object, your text hyperlink may not work. |
 |
Expanded Hyperlink
View &endash; Click to toggle between the display in the Text Editor
of hyperlinked text and its underlying code. |
 |
No CSS Formatting
&endash; Click to toggle on or off the removal of any scaling or positioning
code from the HTML. (Not
available in Text or Title Edit Mode.) |

