This example is based on using the Action Editor and the Behavior Editor. It will help with this tutorial to have some idea of what is in those other tutorials! Here we cover:
To see the drag and drop in action, preview this page, then try dragging and dropping the objects below. The right-hand smoked glass is a drag-but-no-drop.
You can't drag and drop me!
You can try but I won't stay there.
Smoked glass effect The smoked glass effect uses a rectangle in PNG 32 image format with transparency set to give a shade of grey.
Set up a drag and drop -- basics
To set up a drag and drop operation as you see above, the basic steps are:
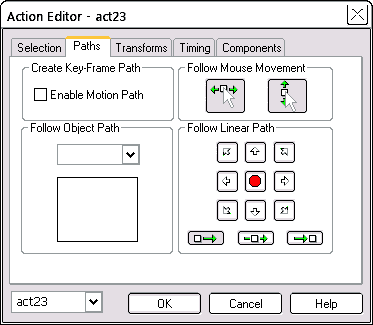
Create a mouse follow action Use the Action Editor to create an action that makes an object follow the mouse pointer. As shown in the image below, select both mouse movement boxes by clicking them.
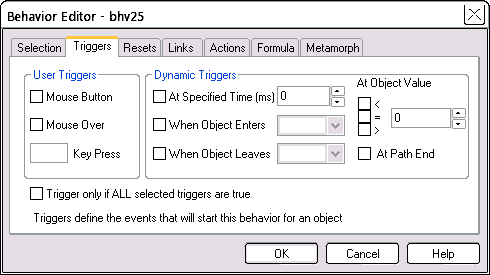
Set a behavior trigger Create a behavior, and from the Triggers tab of the Behavior Editor, check the Mouse Button box. This will start the mouse-following action when the mouse button is down -- the drag part of the drag and drop.
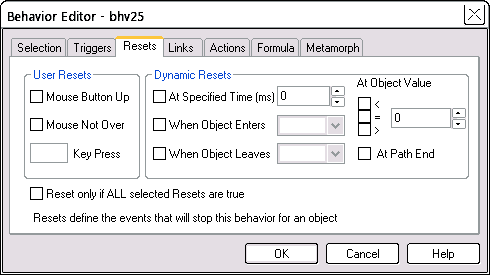
Set a behavior reset From the Resets tab of the Behavior Editor, check the Mouse Button Up box. This will end the mouse-following action when the mouse button is up -- the drop part of the drag and drop.
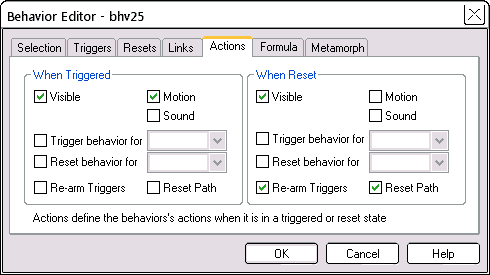
Set behavior actions
Using the Actions tab of the Behavior Editor "When Reset" section, uncheck the Motion box. When the behavior ends, the mouse-following motion should cease.
Uncheck the Reset Path box. This will stop the dropped object from jumping back to its starting position. If you require the drag-but-no-drop action demonstrated at the top of this tutorial (the object jumping back to its starting position), leave this box checked.
While viewing the Actions tab, check that the other checkboxes are in the state shown.
Apply the same action and behavior to other objects
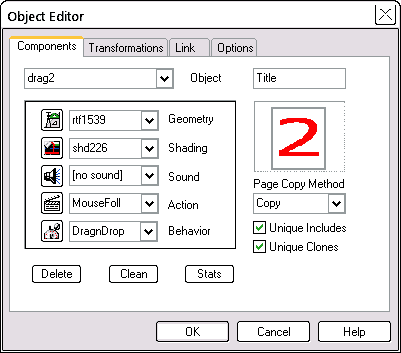
If you want to apply the same behavior and action to other objects, do so via the Object Editor. First, select the fresh object to have the behavior and action, then open the Object Editor > Components tab.
Select the action and behavior from the drop-down lists. Notice that we have named our action "MouseFoll" and the behavior "DragnDrop" simply to make them easy to find in these lists. Repeat these steps for each fresh object.
At the end of these steps, if you open the Action Editor > Selection tab you'll see all the objects that have our MouseFoll action assigned. Similarly for the Behavior Editor and the DragnDrop behavior.
Change cursor on mouseover (CSS)
It is good to give your visitor some visual indication that a drag option is possible, so we have done this by changing the mouse cursor. We applied a different cursor style to each of the drag and drop objects by using a Code object (of type "in CSS").
Our objects are mostly called drag1, drag2 etc. In the code object, these objects have to be referred to as #Odrag1, #Odrag2 etc, because those are the names they have in the published page. All objects are prefixed with hash then capital "Oh", not zero.
If you use regular object names, as we did for some drag and drops in the image tutorial, the prefix is an "O" in front of the regular object name to give references like #Oobj4120.
Following is the text of the code object we used on this page. Follow the same format for your code object.