SiteSpinner Pro Tutorials banner
< Tutorials Home
Manipulating Objects

This tutorial is all about manipulating objects generally -- selecting, moving and changing -- things that apply to just about any object. Topics covered here are:

Selecting an object
Selecting hidden objects
Zoom in and out
Selecting multiple objects
Selecting many objects at once
Making a permanent group
Edit objects of a group
Use the Ctrl key to temporarily ungroup
Select the object by name
Rotating, scaling and skewing
Z-order (front to back position)
Why worry about z-order?
Change the z-order
Locking objects
Controlling object outlines
Keyboard shortcuts (hot keys)
Ctrl+Z is your friend


SiteSpinner Pro logo
Selecting an object

The simplest way to select an object is to click it with your mouse.

If you know the object's name, you can also select it from the Page toolbar drop-down list, the Object Editor or the Quick Editor.

The list on the Page toolbar displays only the objects on the current page. The two editors display all the objects in the current project.

For important objects, consider giving each a unique name -- just so you can find them easily. Do this by over-typing the current name in one of the edit boxes. Some of the colored rectangles further down this page have special names, just to make identification easier.

See also: Naming objects


Selecting hidden objects

Sometimes objects may be positioned on top of each other. If so, hold down "Shift" on your keyboard while clicking -- this will cycle through each of the objects under your mouse. The workpage uses a last selected object preference. That is, if multiple objects are under your mouse pointer when you click, SiteSpinner will re-select the current object if it is one of the objects. This means that you can manipulate an object even if it is completely behind another object.

Try this out with three rectangles like the ones below. Set them so they mostly overlap. You could also open this page of the project file in your workpage, and use the objects already here.

Then try the following:
Drop-down object list
Quick Editor button
Object Editor button
Drop-down object list
Quick Editor button
Zoom in and out

Sometimes it is helpful to zoom in for a closer look at something, or zoom out to make a big selection.

The zoom in/out and "normal size" buttons are on the Display toolbar. With zoom selected, the mouse cursor changes to a magnifying glass and:
If you have a wheel mouse, you can also zoom in or out by clicking the wheel button, then rolling the wheel. To restore the wheel to its usual scrolling, click the wheel button again.


Zoom in or out button, and Unzoom
Zoom cursor
Selecting multiple objects

To select more than one object for some operation, perhaps a move, you have these choices:
Marquee selections do not include any objects the bounding box does not completely enclose. Suppose you have some objects on a background, and you want to select them only, without the background:
You cannot include a locked object in a multiple selection -- you'll get a helpful reminder if you try.

Marquee selection partly made
Selection fully made
A marquee selection partially made
Selecting many objects at once

There are additional, wide ranging select options available on the right-click context menu. To see them in operation, select an object then right click. Among the options available, you have:

Select All
which selects all objects on the page (provided they are unlocked). Ctrl+A is a convenient keyboard shortcut for this operation. A=All.

Select
provides some sub-options:

"Select All" options
To use any of the sub-options, first select an object. Then to select everything above that object, but not the object itself, use Select All Above. The other options work in a similar manner.
 
Select All Below
is particularly useful when you have a large page and you want to delete or add something in the top or middle of the page. Select All Below, then drag the selected group to quickly close up or make a gap.

You can also use the keyboard arrow keys to move the selection, even if it is off the bottom of your screen.


Moving Objects

With an object or group of objects selected, you can now move it around your workpage:
Quick Editor button
Object Editor button
Making a permanent group

Until now, the groups we have been dealing with have been temporary groups -- also called selections, Click on something else, and the selection vanishes. To make your selection into a permanent group, click the Group button on the bottom "Arrange" toolbar. Next to it is a button to ungroup again.

Use a permanent group if you want to keep a group of objects always together.

Also set a permanent group if you want to make a group of smaller images into one larger, more economical image. To do this, set Re-Render on for the group in the Quick Editor > Object tab. There is an example of this in the Fast Start tutorial: Merge the two images.
Group/ungroup buttons
Quick Editor button
Edit objects of a group

Once you have grouped some objects, it becomes more difficult to make minor adjustments -- e.g. to move something slightly or edit text. If you know the object name, you can call up the object in the Quick Editor, and make the adjustment while the object is still part of the group -- even see the effect immediately on the workpage.  If you ungroup, which is very easy to do, you lose the group object's attributes (e.g., FX, links, etc). If the group has no group attributes, then un-grouping is the answer. If the group has attributes, there are two solutions:


Use the Ctrl key to temporarily ungroup

If you hold the CTRL key down when un-grouping a permanent group, the group will stay in place as a temporary group. This allows you to use CTRL+Click to add or remove objects from the group (as you can do with temporary groups) without losing the group object's attributes (e.g., FX, links, etc). Be sure to re-group immediately afterwards, before clicking anywhere outside the group, or you will lose the temporary group -- and its attributes.

When only one object remains in a temporary group, you will not be able to make the group permanent again. If you want to keep the group, add something back in at least temporarily -- you need at least two objects for a permanent group.

So to remove an object temporarily from the group:
Then to return an object back into the group:
It is very easy to click outside the temporary group and lose the group -- and its attributes!. If you intend to use this method, we suggest you make a little test project with say four colored rectangles and a group (give the group a name so that you know when you have lost it), and practise the technique there.


Select the object by name

When you know or have found the name of an object, you can select it by name
from say the Quick Editor, without having to click on it. It helps if you have given the object a meaningful name, instead of the default "objxxx". But as is often the case, it will have only the default name.

If the group is one you have created recently, perhaps having just copied it, you can find the parts near the bottom of the object drop-down list. If however you created the group some time ago, there is not a super-easy way to find the components of a group. The Quick Editor is helpful in showing a thumbnail of the object selected, once you have selected the object. But finding the object name is the hard part.

While previewing your page, use the "View Code" option of your browser to look at the code for your page. Or use SiteSpinner's Code Window.  Search for the the name of the group object. You'll find all the individual objects that comprise the group often with names in sequence like Oobj868, Oobj869 and so on. These are the real object names with an "O" prefix. Armed with that information, you can then again select the object by name from say the Quick Editor. Confirm that you have the correct object via the Quick Editor thumbnail. Then again, you can to make the changes without un-grouping.


Toggle Code Window
Rotating, scaling and skewing

You can rotate, skew, scale and move most objects  either directly in the workpage or in the Quick and Object Editors. The Editors provide the ability to enter a precise numerical value when you want it. You can rotate and skew only in the Design layout tab.

At the top of the Tools toolbar (left-toolbar) are two select buttons. Use the left, circular-arrow button to select an object for rotation and skew. Use either button for the other operations: moving and scaling. You may find the straight-arrow button more convenient for that purpose, since that is all it does.

Most times you can resize or scale an object just by dragging an edge or a corner. If you want it to keep its correct proportions, hold the Ctrl key down while you drag.

If you can rotate or skew, the object will show special little handles, very much like the handles showing in the circular-arrow button.

Each object has an origin or center of rotation, which you can drag to position. This will affect the point around which the object rotates or skews. This origin shows as a circle with little cross-hairs.

Quick Editor button
Object Editor button
Move and stretch tool
Rotate and skew tool
Crosshairs
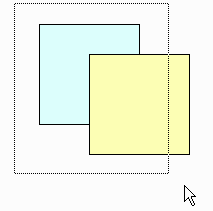
Scaling and rotation exercise

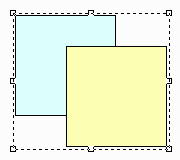
In this exercise, let's take the green rectangle on the left, rotate it, scale and position it to make a horizontal rectangle.

You can do this by opening this page as a workpage,  by copying the rectangle into a fresh workpage, or in preview, by dragging the rectangle image to a fresh workpage.
Vertical test bar
Quick Editor button
Open the Quick Editor by clicking the Quick Editor button or pressing Ctrl+Q.

Select the Rotate tool on the Tools toolbar (left).

Select the green rectangle with your mouse. Rotation and skew handles should appear. If they don't, first select the Design layout tab.

Move the mouse cursor over one of the rotation handles at the corner until it turns into a larger rotation handle.

Then rotate it by dragging the corner with your mouse mouse until the rectangle is almost horizontal.

Select the blue arrow on the Tools toolbar and move the cursor over the top-left scale handles.

As you hover your mouse over the rectangle, you should see two kinds of handles. Double crossed arrows (move handles) will reposition the rectangle.

Two headed arrow (scale handles) will stretch or shrink the rectangle.

Drag the corners until the rectangle is about 12 pixels high and 586 wide.

Use the Quick Editor > Object tab to set these values precisely. The width and height values are the reverse of what you might expect -- this is because of the 90
°
rotation.

Use the Quick Editor to set the precise rotation, Rotate, to 90.00
° and the scaling to x Scale=0.98 and y Scale=1.02.  Use either the up/down arrows in the Quick Editor or enter the values directly into the edit boxes.

If you dragged the rectangle image from your browser onto another workpage, the scale is different (about x:1.4, y:3.0). There you are working with an image. Here, on this workpage, you are still working with a rectangle.

Use the keyboard arrow keys to nudge the rectangle so that the left edge is at x=100 and the top edge is at end of this text object.

At the end of this, you should have something that looks like the horizontal bar just below. And if you don't, who cares?  Hope you had fun doing it.

Rotate and skew tool
Rotate cursor
Move and stretch tool
Move cursor
Stretch cursors
Quick Editor button
Resulting horizontal bar
See also: Rotating and skewing an image


Z-order (front to back position)

You are probably familiar with the idea of an x-axis and a y-axis on web-pages or graphs:
You can change the x-order and the y-order of objects just by dragging and dropping. Or in the Quick Editor, where you see the x,y coordinates of the center of the object.

The z-axis runs out in a third dimension from back to front -- like the pages in a closed book when you are looking at the front cover.

Your workpage displays objects in a back to front order -- objects at the front will hide objects behind. When you create a new object, it gets a z-order to place it in front of all other objects. The drop-down object list at the top of your page displays the items in z-order -- the last object you added is at the bottom of the list.


Why worry about z-order?

For simple pages, you needn't worry much about z-order. However here are three reasons why you should at least consider it:
Quick Editor button
Drop-down object list
Project Options Advanced tab -- object sorting
Change the z-order

Control z-order from four buttons on the bottom toolbar. There are 4 options. From the left:
Remember "front" is bottom of the page -- this is opposite to the normal terminology where you might expect "front" to be the top of a document.

Try this example using the rectangles below -- or something similar on your own workpage. (Cloned from the Hidden Objects example above.)   
  1. Click on the topmost rectangle
  2. Press the Back button on the align toolbar. (Third button from the left in the group)
  3. This may move the top rectangle under the next one down. If it doesn't, click the Back button again and again until it does. Each click moves the rectangle one item further back in the z-order. Confirm this by inspecting the object drop-down list box
  4. Press the Forward button (second from the left). The rectangle should show on top again
  5. Experiment with the other buttons so that you feel confident in moving things forward and back in the z-order
  6. As a final test, move all rectangles to front. Then reverse the initial order so that the red rectangle is on top, then the cyan, yellow and pink
SiteSpinner Pro users have an option to see the z-order visually. In dual mode layout, select the Objects tab, and you will see the objects arranged according to the current z-order. As you move objects forward or back, you will see them move up or down the page. You may find it helpful to zoom out to gain a broader perspective.
Z-order buttons
Z-order buttons
Locking objects

Once your object is positioned and set up correctly you may wish to prevent it from being accidentally changed. Do this by locking it.
  1. Select any object with your mouse. Move it a little to verify it does move
  2. Select the Key button on the Tools toolbar at the left. You can also select an equivalent in the Quick Editor > Object tab, the Object Editor, or press Ctrl-L on the keyboard. The Key icon should change to a Lock
  3. Try to move the now locked object -- it should refuse to shift
  4. Press the Lock button to unlock it
The Edit Menu Lock All and Unlock All commands will act on all objects on the page.

If an object refuses to move, check its Lock state. A locked object shows a little padlock cursor when you hover your mouse over it.

Alt+U will unlock everything on a page (hold down the alt key and press U on the keyboard).

You cannot include a locked object in a multiple selection.
Lock an object
Unlock an object
Tutorials banner
Padlock
Controlling object outlines

On the SiteSpinner workpage, certain objects display in particular ways. A selected object has a dashed selection outline, and sizing handles -- the little square boxes. Objects with zero width outlines, still display as a dashed outline, even though in the final version of your page, the dashed outlines will not show.

Sometimes you may wish to not see these outlines -- you may be looking for precise alignments and the default outlines get in the way. If so, you can hide some or all of them.

There are some commands on the main menu > View. But here is the full list:
1 to 4 are toggle functions. One operation hides the item, a second operation shows it again. If you get into a tangle, ALT+5 resets everything to the usual defaults. You may not see the effect of a command unless you have a selected object or zero width outlined object on your page.
Keyboard shortcuts (hot keys)

Many operations have keyboard shortcuts, written in the menus as for example:
Some common ones that are used in most Windows programs:
Some useful other shortcuts used by SiteSpinner:
See also: Access Keys which are keyboard shortcuts for web pages.
Ctrl+Z is your friend

If you accidentally stretch or transform something you only meant to move, try Ctrl+Z to undo. Also available under Edit > Undo.

Another way of undoing changes that involve accidental transformations is the Quick Editor > Object tab Reset button.

See also:
Workpage tutorial